
Installing Business Content
Use
You need to transfer the Business Content objects from the SAP delivery version (D version) into the active version (A version) in order to be able to work with them.
Procedure
- In the main menu of the SAP Business Information Warehouse select BW Administration ->Administrator Workbench.
- Select the Business Content function area using the corresponding push button in the left-hand navigation window or by Jump -> Install Business Content
With the push button Navigation Window On/Off on the application toolbar in the Administrator Workbench, you can show or hide the left-hand navigation window. We assume that the navigation window remains hidden in the following section.
- If you want to assign source systems, select Assignment Source System. The Select Source System as Default dialog window appears.
Select one or more source systems by setting the corresponding indicators in the Default Assignment column.
The assignment of source systems is only relevant for transfer rules, file DataSources and InfoPackages. If there is more than one source system, only those objects assigned to the specified source system are collected for the transfer. Objects that have not been assigned to the specified source systems are ignored.
If you do not select a source system, all source systems are automatically assigned.
You can subsequently change the selection you made using Source System Assignment.
- Change the required settings in the following selection list:
Grouping
Choose the objects that you want the system to consider. The groupings summarize all the objects of an area.
Grouping
|
Information
|
Only necessary objects (standard setting)
|
Only those objects that are really necessary for the action, that is, the transport of the selected objects, are taken into account (minimal selection).
|
In data flow before
|
All objects are collected that submit data to a collected object.
|
In data flow after
|
All objects are collected that obtain data from a collected object.
|
In data flow before and after
|
All objects are collected that both submit and collect data.
|
If you change the default setting (only necessary objects), the new setting will be used as a standard for the user.
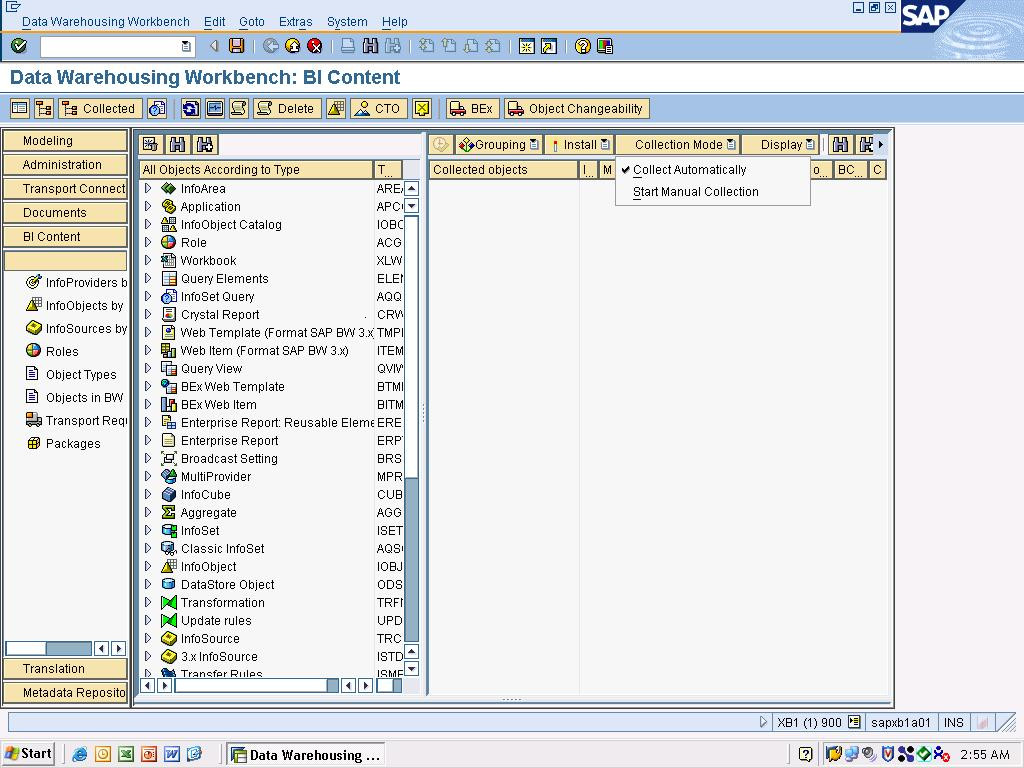
Collection Mode
Select how you want to collect the objects:
Collection Mode
|
Information
|
Automatic collection (standard setting).
|
The data is collected directly when the objects are selected.
|
Start manual collection
|
The data is only collected when you select Collect dependent objects.
|
- Select an Object Type you want to transfer.
You have various selection options in the navigation window in the Business Content function area of the Administrator Workbench.
When you select an object type, the arrangement and selection of the existing objects are displayed in the tree structure of the central screen area as below:
Object Type in the Administrator Workbench Navigation Window.
|
Display objects in the tree structure in the central screen area.
|
Data targets by InfoAreas
|
List of InfoCubes and ODS objects by InfoAreas.
|
InfoObjects by application components.
|
List of objects by InfoObject catalog and by InfoAreas
|
InfoSources by application components.
|
List of InfoSources for master data and transaction data.
|
Roles
|
List of the standard and branch roles.
|
Object Types
|
List of objects by type (InfoArea, application, InfoObject catalog, role, workbook, query element, InfoSet query, Crystal Reports template, Web template, Web item, saved query view, MultiProvider, InfoCube, InfoObject, InfoSet, Classic InfoSet, ODS object, update rules, InfoSource transaction data, transfer rules, source system, InfoPackage group, InfoPackage, process chain, Reporting Agent, report/report interface, currency conversion type
|
Objects in BW Patch
|
List of installed BW patches including list of objects newly delivered or re-delivered with the respective patch.
|
Package
|
List of packages in which there are SAP objects.
|
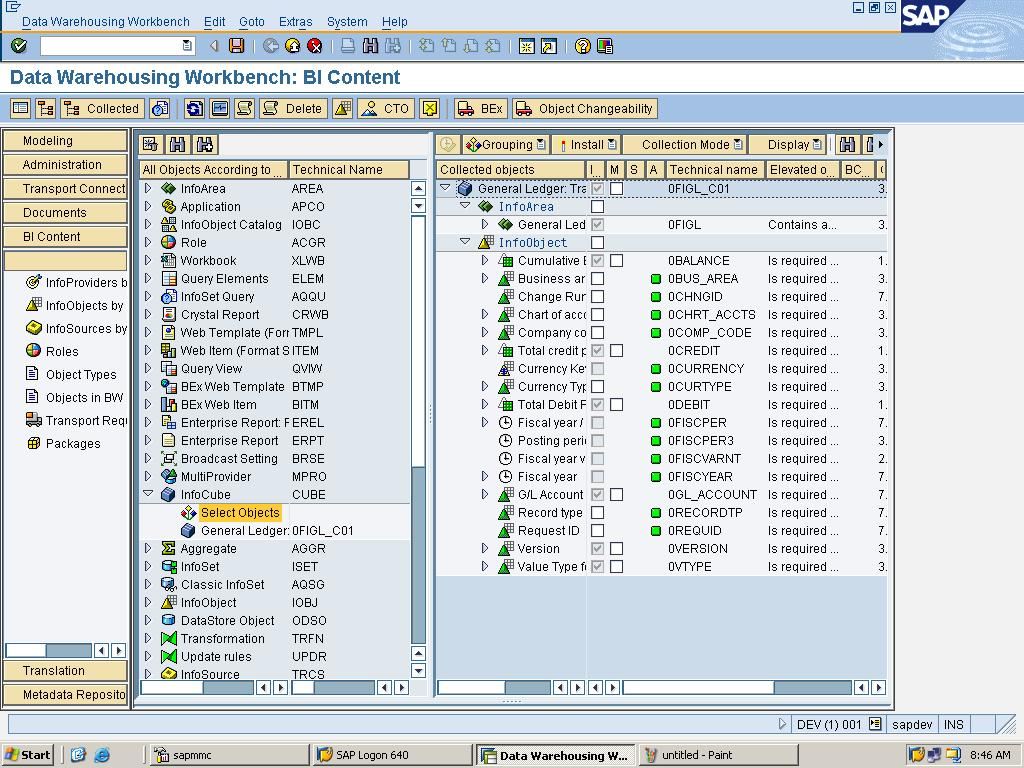
- Select the object(s) you want to transfer in the central screen area and transfer them into the right-hand Collected Objects screen area by drag and drop.
Using Search for Object, you can also search for objects by a string (for example, 0CUST) or by pattern (for example, 0CUST_*B).
You can display a value help for every object type: By double clicking on Select Objects in the tree structure of the corresponding object type, the screen Value Help for Metadata appears. Select the required objects. Choose
Transfer selections.
You can only use Business Content DataSources of a source system for transferring data in BW, when you have transferred these in their active forms and then copied them into the BW system.
The system displays the selected object(s) and all dependent objects in the Collected Objects screen area. To reduce the time taken to access the objects when wanting to use them again, the collected objects are stored by default in the
When transferring the objects to the Collected Objects screen area, the objects are added at the same time to the tree structure of the corresponding object type in the central screen area and are saved for the respective user. This personal object list is available every time the program is restarted.
To remove objects from the personal list, select the object in question and choose Remove Object from Display via the context menu or via.
Objects that are listed in several tree structures are only displayed as changeable the first time they appear. Each time they are listed again, they are highlighted in gray and are not ready for input.
- Check the following columns in the Collected Objects screen area:
The following Business Content objects are highlighted in the Transfer column by default:
- Objects transferred for the first time
- Objects delivered again in a new version from Business Content.
When the SAP delivery version and the active version can be compared, a check box is shown in the column Compare (X) or Copy.
There is a check mark in this checkbox by default. In this case, your version is compared with the new SAP delivery version and complimented.
If you remove the indicator then the new SAP delivery version is copied in its entirety.
Date symbol: The object is already available in an active version. However, the active version belongs to an older Content Release. We recommend that you adopt the new version
Gray Selection: There is an active version in the system, but the object status is given as inactive. The object has to be subsequently edited.
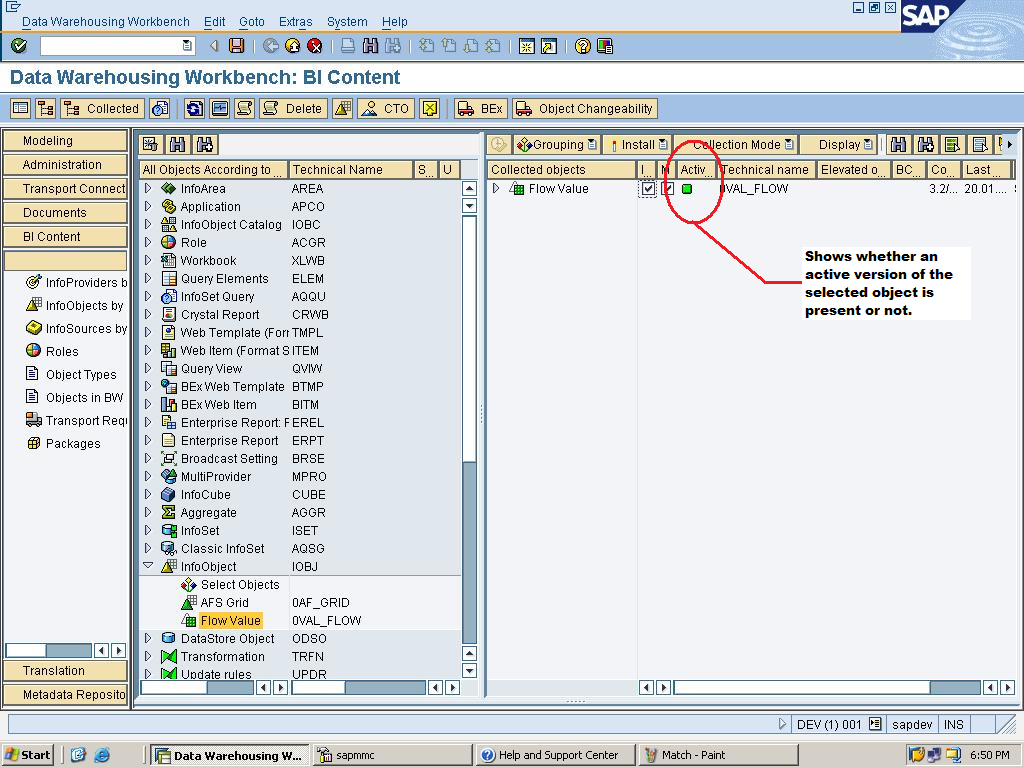
In the Active Version Available column, there are the following display options:
Indicator
|
Meaning
|
No Indicator
|
The object is not available in an active version.
|
The object is available in an active version. You can decide whether to retain this version or adopt again.
|
- Change the required settings in the following selection list:
Transfer Type
|
Information
|
Simulate transfer
|
A test is made to see if errors are likely to occur during the transfer. The most important objects can be checked in the simulation. However, this does not include all dependent objects Therefore, only use the simulation as an orientation help to be able to recognize errors and remove them.
|
Install
|
The selected objects are transferred immediately.
|
Transfer in background
|
The selected objects are transferred in the background.
|
Transfer and transport
|
The selected objects are transferred immediately and then written to a transport request in the connection.
|
We recommend Transfer in the Background, because transferring a large number of objects and especially changing already active objects can take up a lot of time.
- You can find out if errors have occurred during the installation of Business Content from a log, which you can request using the Log pushbutton. Repair the errors in the respective maintenance transaction. Try to transfer the Business Content again.
Introduction to BI Content:
Business Content is a pre-configured set of role and task-relevant information models based on consistent metadata in the SAP Business Information Warehouse. Business Content provides roles within a company with the information they need to carry out their tasks.
This information model includes integral roles, workbooks, queries, InfoSources, InfoCubes, ODS objects, key figures, characteristics, update rules, and extractors for SAP R/3, Business Applications, and for other selection applications.
Business Content can:
·be used in particular industries without being modified
·be modified, meaning you can work with it to any degree of detail
·serve as a template or an example for customer-defined Business Content
·be modified, meaning you can work with it to any degree of detail
·serve as a template or an example for customer-defined Business Content
1. SAP BI OBJECTS:
All the Objects in the SAP BI are classified into Customized objects and Standard Objects.
Customized object are those which are created by the user and the objects which are provided by SAP are known as Standard Objects or Business Content Objects.
All the BI Content objects have the technical name with prefix 0.
a. Types of Versions
There are four different versions of objects in SAP BI
New: The newly created objects will be in this version.
Activated: The objects which are activated and ready to use will be in this version.
Modified: The objects which are modified and yet to be activated. These objects are not ready to be used.
Delivered: The entire objects in the BI Content will be available in this version.
BI Content Installation
Before using any object in the BI Content we need to change the version of the object from delivered version to active version. The process of copying the BI Content object form delivered version to active version is known as “BI Content Installation”.
The T-code to open the BI Content work bench is RSOR.

The view of the SCREEN 2 changes basing on the selection in SCREEN 1.
Select the option “Object Types” in SCREEN 1; in SCREEN 2 we see all the objects according to type.

Select the object that needs to be installed from SCREEN 2 to SCREEN 3.

 `
`- Collection Mode:
The type of selection can be defined by the collection mode in the SCREEN 3, the object can be collected automatically or by manually.
When we select automatically, then all the object that are to be transferred are collected into the SCREEN 3 automatically. But when you select manually then we need to select the object manually.
- Grouping:
How the object needs to collected is defined by the collection mode, but what objects need to be collected can be defined by Grouping.
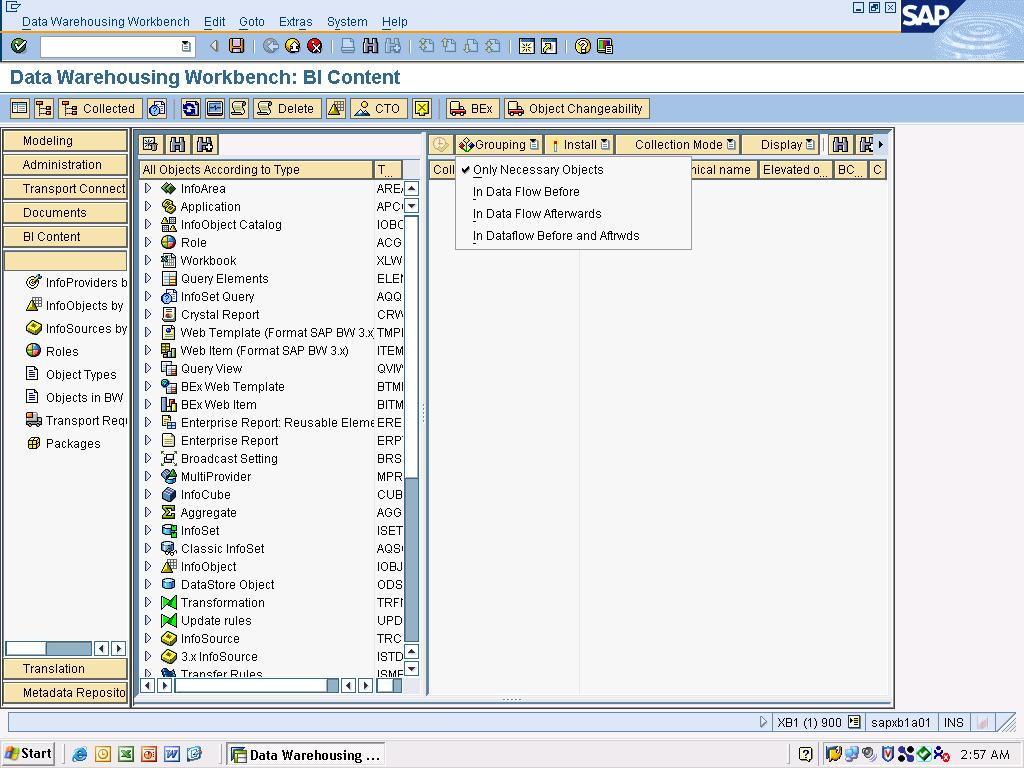
Objects grouping can be done in four ways.
Only Necessary Objects:
When we use this option, only the main object and the objects on which the main object is dependent on will be collected.
For Example: If we select a cube then all the infoobjects and infoareas on which the cube is dependent on will be collected.
Scenario: When we want to install a single query then we can use this grouping method, by which we get only the query without any other data flow objects.
In Data Flow Before:
When we use this option, only the main object, the objects on which the main object is dependent and the entire object which are required to load the data into the main object will be collected.
For Example: If we select a cube then all the infoobjects & infoareas on which the cube is dependent on and the info sources and the update rule from which the data will be loaded are collected.
Scenario: This grouping method can be used when we require installing only a particular query on the InfoProvider along with the InfoProvider and other objects. And we can avoid installing other unnecessary queries which are on that InfoProvider.

In Data Flow Afterwards:
When we use this option, only the main object, the objects on which the main object is dependent and the entire objects which retrieve the data from the main object will be collected.
For Example: If we select a cube then all the infoobjects & infoareas on which the cube is dependent on and the queries and Multiproviders which are build on that info cube will be collected.
Scenario: This grouping method can be used when we require installing all queries on the InfoProvider along with the InfoProvider and other objects.
In Dataflow Before and afterwards:
When we use this option, only the main object, the objects on which the main object is dependent, entire objects which are required to load the data into the main object and the entire objects which retrieve the data from the main object will be collected.
For Example: If we select a cube then all the infoobject & infoareas on which the cube is dependent on, the info sources and the update rule from which the data will be loaded and the queries and Multiproviders which are build on that info cube will be collected.
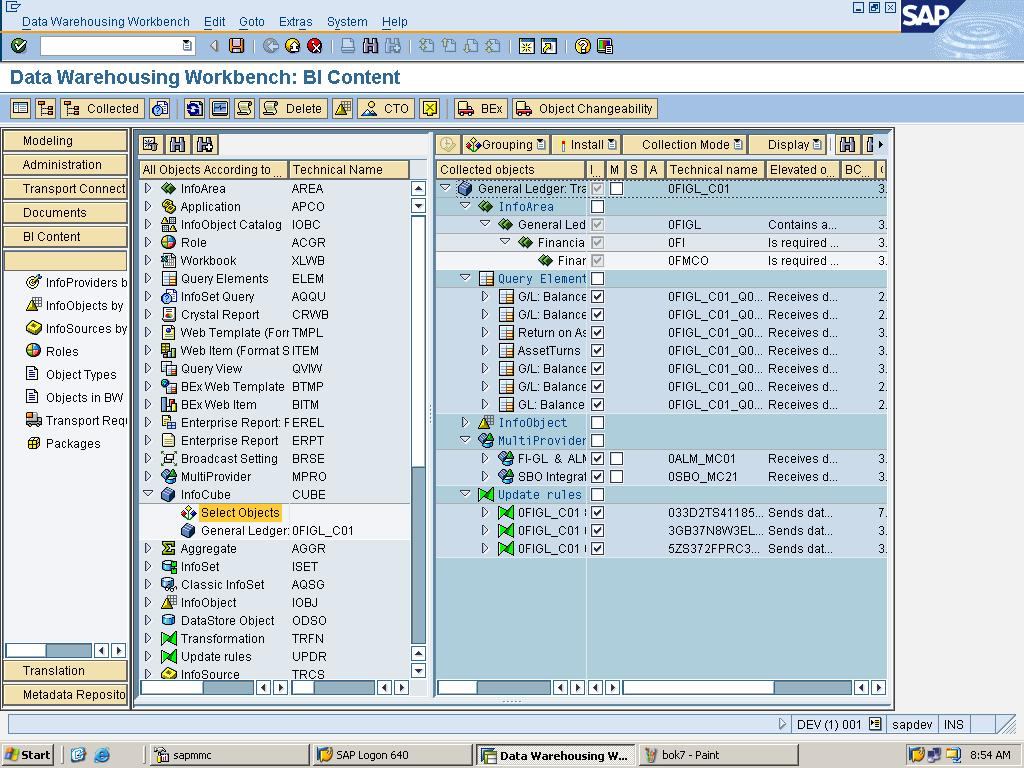
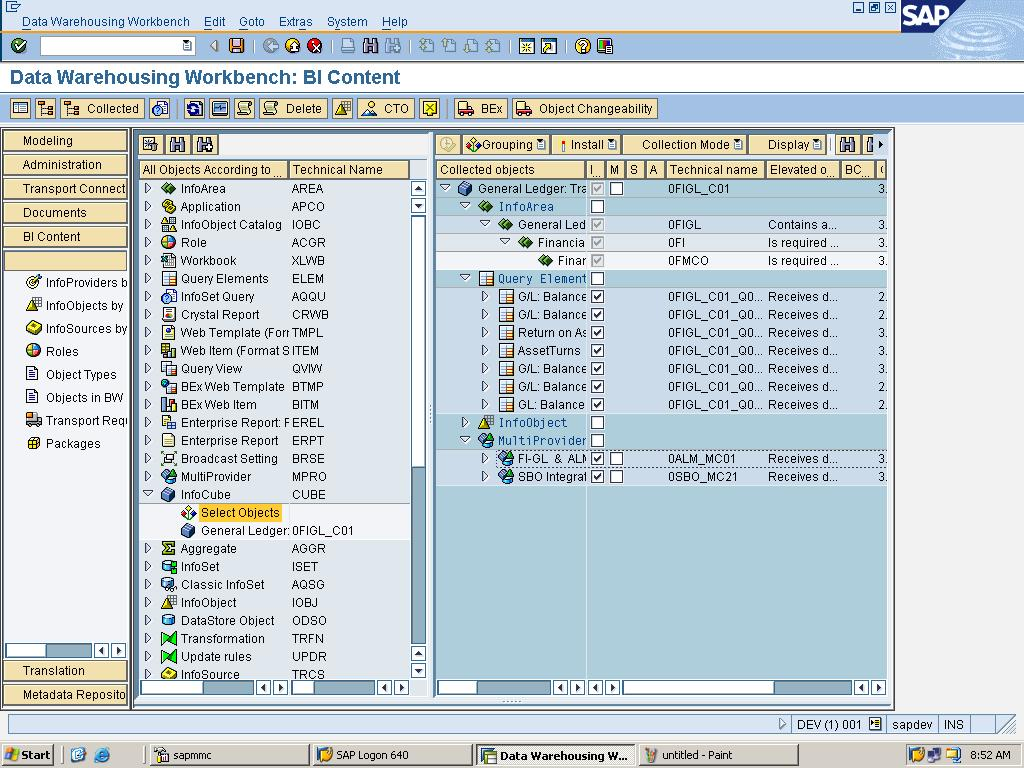
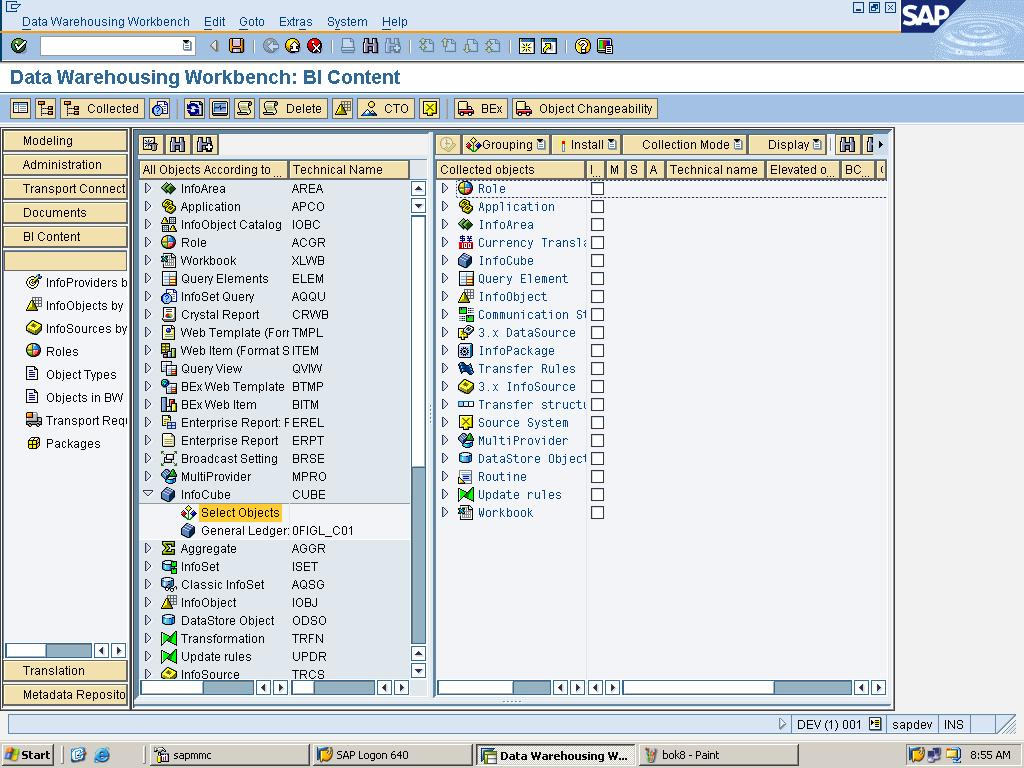
Display
The objects which are collected can be displayed as a Hierarchy and as a List.
In the above screen shot the objects are displayed as a hierarchy.
And the below screen shot displays the objects as a list.
- Installation of the objects:
Check the check boxes of objects which are to be installed.
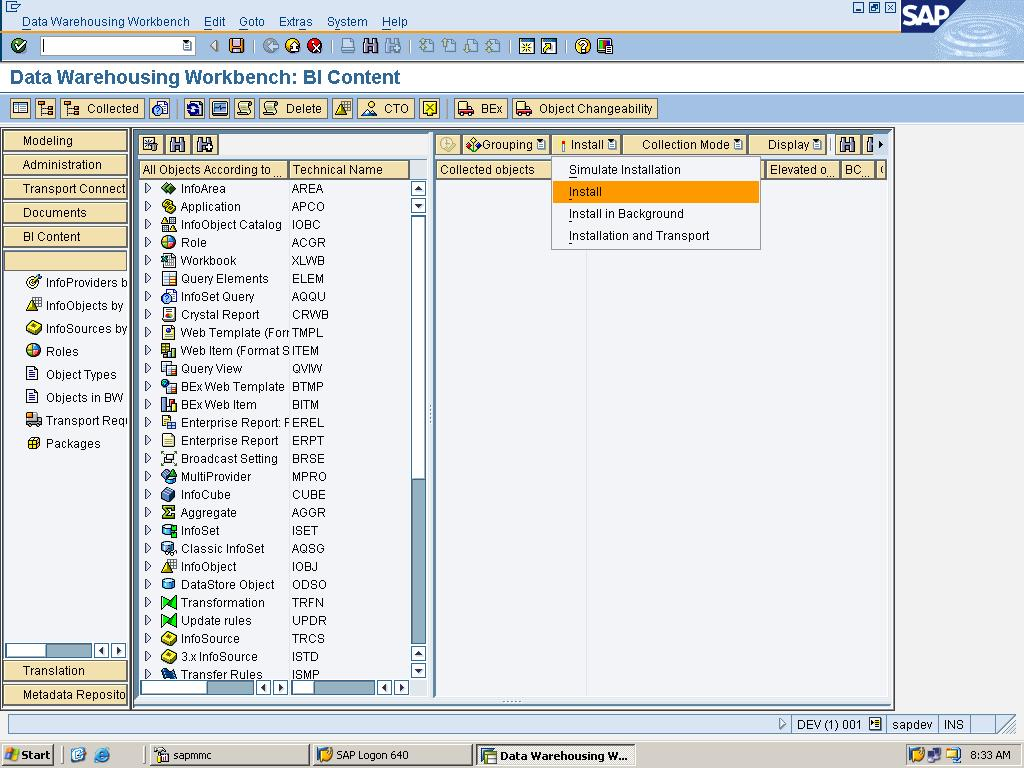
Simulate Installation:
The system runs a test to see whether any errors are likely to occur during the installation. However, not all errors that may occur can be identified during simulation: Some error messages can only be generated when a real A version (not just a simulation) is available in the system. You should, therefore, only use the simulation function as a rough guide to help you identify and remove basic errors.
Install:
The selected objects are installed immediately
Install in Background:
The selected objects are installed in the background.
If we have a large number of objects, then we can use the Install in Background option because installing a large number of objects can take a long time.
Install and Transport:
The selected objects are installed immediately and then written to a transport request.
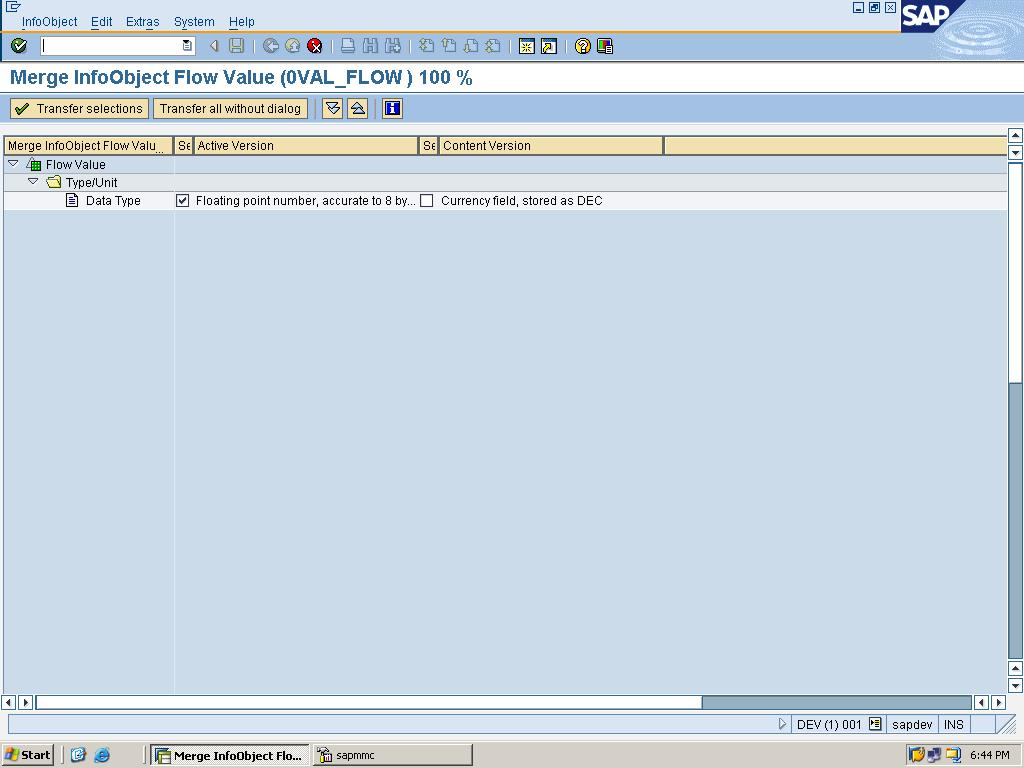
- Match (X) or copy:
When there is an active version of the object that is being installed, then it will be overwritten if we don’t check this check box.
If you check this check box and if there is difference between the active version and content version then it will try to merge the properties of both the active version and delivered version.
Conclusion:
Thus the objects provided by the BI Content serve as a template or an example for customer-defined Business Content. This Document explains about the Navigation of the Administrator Workbench to install Business Content and the procedure to install the objects provided by the BI Content.